Friday, August 30, 2013

The Leaves are Falling!

Tutorial on Leaflet, by Helen Williams


Ann Hathaway, a fellow CZT from Seminar 10 (applause, applause!) asked that I post some additional instruction on the tangle Leaflet, by Helen Williams. 

She writes, "I have tried Leaflet a couple of times and have been surprised that is it not as easy as it appears it should be!"

This is the step-out, along with my notes, that I wrote while learning the tangle:
 
Helen has beautifully illustrated directions on her blog A Little Lime. (click to see!) 
 
The key to drawing this pattern is having the curved lines meet at the vertical lines.  The curve of each side doesn't have to mirror perfectly, just be sure that those lines meet.  This creates the top of one 'leaf' and the bottom of another.
 
The other factor for a smooth look is to retrace the mid line of each 'leaf' as you add the 'veins'.  These lines do not have to be symmetrical, but it makes the pattern appear more fluid.  Don't get too concerned with this because once all of the sections are filled in, it doesn't make a huge difference if you vary those lines.
 
For shading, I like to shade from the outer edges of alternating vertical sections.  It really makes the pattern pop.
 
Thank you to Ann for asking about this pretty pattern! 
 
PS - You can visit Ann at Deep Magic Tangles.


Thursday, August 29, 2013

Tangled Packages

I enjoy using tangles on unexpected things.  For example, this is how I decorated my husband's birthday package:

 
It's actually the top of his wrapped gift - about the size of a shirt box. 
 
The particulars:
 
I first wrapped the box in freezer paper, my favorite multi-purpose paper.  The side of the box even reads: "Use for Arts & Crafts".  Who knew?!
 
 
It's coated on one side with a thin plastic film and a nice white paper on the other.  When I wrap gifts I put the coated side down so markers do not bleed through to the present underneath.
 
I use these pens -


A brand new, juicy Sharpie is easy to work with and I like the size of the fine point.  The Micron 08 is a thicker nib than the usual 01 used on tiles, but it's width contrasts nicely with the Sharpie.
 
I begin with a border, then tangle my way into the middle until I am left with enough space to write my greeting. The border I chose for the design pictured above was inspired by a Mehndi pattern (page 22) in Sandy Bartholomew's book Totally Tangled.  
 
The next time you need some wrapping paper, tangle your own.  You 're sure to make someone smile!


Wednesday, August 28, 2013

Wednesday's Words of Wisdom


The beauty of Zentangle® is that it provides a way for people to remain artists as they grow up. 

Others who have grown up and forgotten they were once artists, rediscover their gift.

Invariably when I teach a Zentangle class, or describe the method to someone, they make a connection to some type of art work they did as a child.  It is fascinating too, because specific memories return: a certain class, a particular pen, an endearing teacher, a painting, a prized drawing. 

These memories are often accompanied by remarks about a particular piece of art they finished and were very proud of - years and years ago.  Then comments follow that reveal a desire to reconnect with that time, place, and ability to create.

My nephew Aaron is a sophomore in high school.  Last summer, sitting around the kitchen table,
I taught him a few tangles.  He produced this with pencil on copy paper. 

 
Last week after the first "String Thing" challenge, Aaron sent this beautiful piece:
 

Aaron's rigorous academic schedule does not allow time for an art class this year, but he is able to express his creativity - in part - through Zentangle.  That's a gift for all of us who get to see his work.

Aaron is an artist and has not lost sight of that as he continues to grow up. 
Makes an aunt proud, and Picasso too, I'm sure!

Tuesday, August 27, 2013

"It's a String Thing" #3

Tuesday is your good news day! 

Today's challenge features String 004 from Linda Farmer's Tangle Patterns.  It was created and shared by Sue Agnew. 
When Sue submitted this string to Linda's website, she said that she often tangles the string itself and then fills in the sections behind it with other tangles, "often spanning more than one section with the same pattern."

Honoring Sue's tangle enthusiasm, we will use patterns that begin with the letter 'S' for Sue.  As a first step, use the pattern Snookums by B J Thomas, CZT to tangle along the string line as Sue suggests.

Once your string line is completed, fill in with as many or as few tangle patterns that begin with
the letter 'S' as you wish. 

There are some very pretty pattern possibilities in this challenge.  Have fun!

 Here are the (Not so) Official Guidelines:
     * Challenges are posted on Tuesdays.          
     *Use the string posted for the week and patterns that begin    
                  with the letter(s) indicated                 
     *Work must be completed on Zentangle tiles or on your 3.5" x 3.5" paper      
     * Submit a photo of your tile saved as jpg or         
                  scan your tile (300 dpi) and save as a jpg    
     *Email your jpg file as an attachment to -  brunoadelem@gmail.com    
     *Entries are to be submitted by Saturday evenings     
   *Photos and 'Best of Show' are posted on Mondays.       

This will be fun and I can't wait to see what you send in.  Tangle on!

Monday, August 26, 2013

"It's a String Thing" #2 Tiles

The tiles from this week's challenge are just beautiful.  Opening emails and seeing them is like receiving gifts on Christmas morning.  Each one makes me smile.  Each one is a delight to open.  From the selection of tangles, to the variations in the patterns, to the individual styles displayed, these entries are real treats.  Let's take a look.

Deanna Spence, winner of last week's challenge, sent in this beautiful tile:
I loved the variations and the curve of the graceful lines in her Fricle tangle pattern as well as the detail in Fancy Nancy.  See how she used Fang - curving it up and breaking it off into smaller and smaller sections as the line rose upward?  Very nice.
 
I am proud to say that my daughter Catherine sent in this entry:
Her Fang tangle pattern is very eye catching.  It hugs the curve of her string line and gives it movement.  I really liked the use of Fescu in the lower left hand corner - so simple and so pretty.
 
To my delight, Deanna sent a second tile:

This one made me tear up a bit, I must admit.  I was so touched with her variations of Fancy Nancy (a creation of mine).  She varied the weight of her lines, the light and darkness of sections, and added dimension with her shading.  I appreciate the work in this too, as I know she taught herself four additional tangles in order to complete this tile.  It is just gorgeous! 
 
It was very trying to single out one tile for this week's 'Best of Show' - but after much deliberating I'm happy to present it to you:
 
This entry is from Mindy.  Its elegance and simplicity kept drawing me back.  Mindy varied the size of the tangle Flez as it follows the center sections created by the strings.  This added depth and an illusion of distance.  She used Flez again behind the main focal point, varying the pattern a bit with some inside aura, darkening of the negative spaces, and shading, to create a curved look to the tangle.  Congratulations, Mindy! 
 
Stop by tomorrow for the particulars of "It's a String Thing"  #3!
 

Friday, August 23, 2013

"Hey Bud!" Part 2

As I mentioned yesterday, Bud is a very versatile pattern:

Here are a two more tiles using some variations on the theme.  This one is a bit busy :)
And this one is my favorite...

I scanned the above tile in grayscale.

This one was scanned in color.

The more I play with this tangle Bud, the more it can do, and the more it seems to shrug and say, "No problem!"  Reminds me of my Bud...

Thursday, August 22, 2013

"Hey Bud!"

A new pattern!  Part 1

I am so excited about this versatile new pattern. Allow me to begin with how I named it, and then work my way to the tangle itself.

It's name is Bud for my son Louie.  He's a man of few words, and even fewer first thing in the morning or at the end of a school day.  In working with him on that - as I tend to be very talkative - I usually give him a quick shout out as he walks by, "Hey Bud!"

Versatility describes Louie.  Name something and he can do it - and with ease, often wondering why it's so special to anyone else watching.  Here is a sampling of what I mean:

Catch a 'lunker' bass, no problem
 
Throw a cast net in the surf and hand feed an egret and a great blue heron, no problem.


Throw a vase, no problem.

Take phenomenal photos, no problem.


Run up a tree, no problemRun up a tree?!  Yes...

 
Go fishing and catch an alligator....NO problem.

...but there are some things a mother should just not see...

On to the pattern -

In the first parent/student assembly marking the beginning of Louie's senior high school year, I scribbled an idea on the back page of my check book.  It was the only paper I had in my purse :)
 
The idea grew into a simple and very fun tangle.   Here is the step out for Bud
The more I played with the initial design, the more versatile it became. 


And there is more, but this post is getting a bit long!  Check back tomorrow.  I will post the step-out for even more variations and a few more finished tiles.  In the meantime, play with this pattern and see what you can come up with.  Have fun!


Wednesday, August 21, 2013

Wednesday's Words of Wisdom

"You can do anything if you have the right tools."

My "It's a String Thing" #1 tile
My brothers and I have our parents to thank for the words of wisdom quoted above.  We grew up hearing them and believing them.
 
If you think about it -  'tools' range in meaning from the implements used to the education, training, and experience received.

The bottom line is - with the right training, education, and tools - all things are possible.

Perhaps that's why the Zentangle® theme:  Anything is possible one stroke at a time™ rings so true to the students of the art...a tile, a Micron pen, a pencil, and a world of possibilities!  

Take a look at "It's a String Thing" this week and send in your picture...keep tangling!  Spread the joy!

Tuesday, August 20, 2013

"It's a String Thing" #2


Tuesday is your good news day - here is the next challenge:

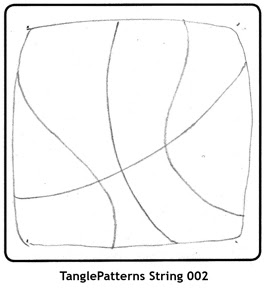
This week we will be using Linda Farmer's string suggestion 002.  I like the curve of the lines (reminiscent of a basketball) and the many sections they create.  We will use patterns that begin with the letter 'F' for Farmer.


A glance at the available patterns on the 'F' tab (second pink bar on the top of the page) at Tangle Patterns will make your head swim with possibilities so I will narrow it down just a bit.
 
Since there are many border-like patterns that lend themselves to this string, your challenge will be to tangle along the string lines on this tile using one or more of these patterns:
 
Fancy Nancy by me :) Adele Bruno
Fang by Celia Norman
Featherfall by Carole Ohl
Flex by Lori Howe
Flowervine by Susan Pundt
Fohbraid by Sandra Strait
Fricle by Julie Evans
Frille by Livia Chua

 Here are the (Not so) Official Guidelines:
     * Challenges are posted on Tuesdays.          
     *Use the string posted for the week and patterns that begin    
                  with the letter(s) indicated                 
     *Work must be completed on Zentangle tiles or on your 3.5" x 3.5" paper      
     * Submit a photo of your tile saved as jpg or         
                  scan your tile (300 dpi) and save as a jpg    
     *Email your jpg file as an attachment to -  brunoadelem@gmail.com    
     *Entries are to be submitted by Saturday evenings     
   *Photos and 'Best of Show' are posted on Mondays.       
 
Have FUN! 


Monday, August 19, 2013

"It's a StringThing" #1 Tiles

The results are in!


This past Saturday I had the pleasure of teaching at the Osceola Decorative Artists monthly gathering.  It was a special treat to be in a room teaming with talent, creativity, and eager minds.  I am indebted to you for your warm welcome. I am especially grateful for your contributions to the inaugural week of "It's a String Thing" challenge. 

Here is a sampling of the tiles completed using Linda Farmer's String 001 and the following patterns that begin with the letter "L":

Leaflet by Helen Williams
Locomotion by Stephanie Kukla
Lacy by Sandra Strait
Lotus Pods by Margaret Bremmer
Lanie by me:)  Adele Bruno

                                                         by Kathryn Crane-Theilen


                                                                          by Grace


                                                                   by Jean Zawicki

                                                                   by Judy Dearolf

                                                                   by Julie Kelley

                                                                     by Kate Dowd

                                                                 by Lynn Ingersoll

                                                                  by Mary Francis

                                                                    by Nan Paras

                                                                     by Sandi Byers
 
 
Choosing one entry over the others was very difficult, but choose I must! 
 
The 'Best of Show' for "It's a String Thing" #1 is...Deanna Spence. Congratulations, Deanna!  Here is her beautiful tile:
 
                                                                   by Deanna Spence

Deanna's shading of Leaflet and the way she finished the edges of both Lanie and Lotus Pods drew me back to her work every time.  I will be sending a little special something in the mail to you, Deana, to mark this special occasion.

Many thanks again to the wonderful women of the Osceola Decorative Artists. 

Stop back tomorrow for the next "It's a String Thing" challenge.

Tangle on!

Friday, August 16, 2013

Tangle a Ceiling Tile?! Part 2


Yesterday we left our little chameleon all tangled in and smiling.  Tangling from this point, I drew a border around the outline of the tile and worked my way inward.  The small holes in the tile didn't pose much of a problem if I used a light touch on my pen.  I found that if I pressed too hard, the nib would catch in the pock marks and create an uneven thickness to my lines.

 
After the border was complete, I added a shadow to the sign he's sitting on and then began tangling poke leaf from the lower left corner, then the right, and met in the middle.
 
 
The one request that our kids had was to include our family name somewhere on the tile.  After adding a few more tangles and a border around the sign, our name was the finishing touch.


Now when we eat at the restaurant, we can look up at the ceiling and see a tangled tile and smile.
 
Think of the possibilities tangling on acoustic tiles can bring - doctor or dentist offices, schools, stores...see what you can do in your corner of the world "one stroke at a time!" 
 
On another note:  There is still time to participate in this week's "String Thing" (see Tuesday's post).  Email your photo today!


Thursday, August 15, 2013

Tangle a Ceilng Tile?! Part 1

Yes!  It is possible to tangle on an acoustic ceiling tile.  Let me explain...

A restaurant chain in our area, Tijuana Flats, encourages customers to paint the 2' x 2' ceiling tiles in a few of its locations.  For the most part the finished tiles are brightly painted in keeping with the colorful atmosphere of the particular place.  The one we frequent is no exception. 

The walls range in color form orange to red to purple and are splattered with graffiti type paintings.  Overhead , the otherwise turquoise ceiling is dotted with patrons' colorful artwork. 

In the midst of all that color, a bit of black and white tangling was sure to stand out.

I asked the manager for a 'ceiling tile to go' and this is how it went...


I sketched my idea for a chameleon on a piece of copy paper and marked it off in grid fashion (pictured above on left).

After that, I taped and trimmed newspaper sheets to fit the 2 ft. x 2 ft. size.  Why newspaper?  Because of the large surface space and it was free :)  The tile itself broke apart easily, especially around the edges and I had to be careful handling it.

I drew the little critter in marker onto the newsprint using the grid to help keep the proportions correct.  If you look closely you can see it under my sketch.  Next, I cut out the newspaper chameleon and traced him onto the tile.  Taking the time to do this reduced the amount of pencil lines on the ceiling tile.  I lightly penciled in the details - his legs, eyes, mouth line, etc.  Then, in true Zentangle® fashion, I put my pencil away.

To outline the chameleon, I used a medium tipped Sharpie brand paint marker.  There was one problem: the tile had a very fine chalky dust covering it.  The marker did not take well to it.  To seal the surface, I diluted white acrylic paint with water and brushed it liberally over the tile.  Once that dried, the marker worked well.  I outlined everything and then thickened the lines around him. 
 
To tangle the little guy, I started with his chin and cheek...
 
...and then worked my way up over his face and down his body.  Doesn't n'zepple look reptile- like as it runs down his back?
 
Next, I tangled from the tip of his curly tail toward his body.  This allowed for a nice overlap where the tangles met.  I used a different tangle for each leg and his underbelly.    
So far, so good!  Because there are so many pictures with this story, I will continue in the next post.  Stop back tomorrow to see what he's smiling about.

Wednesday, August 14, 2013

Wednesday's Words of Wisdom

"Remember to keep up the practice of Zentagle."  ~ Maria Thomas

..this encouragement came at the close of an email I received from Maria Thomas last fall. 

Her words took me back a bit.  I felt them as a gentle reminder, a re-focus as well as a challenge. 

Previously, I'd sent a little gift and note to her and Rick to thank them for the wonderful CZT™ Seminar.  I was bursting with enthusiasm for teaching others about Zentangle®, full of passion for the art, preoccupied with starting a business, setting up a place to teach, figuring out the particulars of ordering supplies, and so on...

Her words gave me pause.  They redirected me. 

There is a lesson in her message. In the midst of the busyness of life, in the midst of tending to the people you love and the things you love to do - pause, pick up a tile, and "remember to keep up the practice of Zentangle."


And here is a shameless plug: "It's a String Thing"  is designed to help you keep up your tangling practice.  Check yesterday's post and get your Microns moving!
                      

Tuesday, August 13, 2013

It's a String Thing #1

Good Morning and welcome to the very beginning of the "It's a String Thing" challenge.

It is very fitting that today's string is created by Linda Farmer.  We owe a debt of gratitude to her for sorting through and publishing the tangles we use.  Her website is a wealth of information on everything from how to draw tangles, to how to organize them, to the stories behind their inspirations and names.  She also has a fabulous write up on strings on the page where our first string is found:

Created by Linda Farmer, CZT

Your challenge is to use this string and tangle with patterns that begin with the letter 'L' for Linda.  Use as few or as many as you'd like. 
Visit Tangle Patterns and click on the letter 'L' - listed on the second pink bar at the top of her page - to choose your pattern(s).

Here are the (Not so) Official Guidelines:

     * Challenges will be posted on Tuesdays.          
     *Use the string posted for the week and patterns that begin    
                  with the letter(s) indicated                 
     *Work must be completed on Zentangle tiles or on your 3.5" x 3.5" paper      
     * Submit a photo of your tile saved as jpg or         
                  scan your tile (300 dpi) and save as a jpg    
     *Email your jpg file as an attachment to -  brunoadelem@gmail.com    
     *Entries are to be submitted by Friday evenings -    
                  I find, sadly I might add, that the cleaning and laundry  
                  need tending to on the weekends :)      
     *Photos and 'Best of Show' will be posted on Mondays.

Have FUN!  Be part of history - tangle this first "It's a String Thing" challenge and send it in!   

Monday, August 12, 2013

New Weekly Challenge Coming Tomorrow!

 As an early student of Zentangle®, I remember my mind flooded with questions, excited and a bit overwhelmed with the sea of possibilities, the sheer number and variety of patterns, and how timid I was about drawing strings.  Strings posed a peculiar  stumbling block for me.  I was not sure what type to draw...curved or straight lines, a few or many lines, and just how many patterns did I want to use?

I considered writing a series of workbooks to not only help myself along in the practice of Zentangle, but to help others begin and thrive in their own journeys as well.

Then, as Providence would have it, this wonderful world of blogging opened up. 

Workbooks...blog...marry the two?  Of course!  And just a few months later - a baby was born.  Just kidding, but certainly this challenge is a product of the two! (So it really was not such a stretch after all... :)

I named it:  "It's a String Thing".

With Linda Farmer's blessing, the 'String Thing' weekly challenges will use strings and patterns from her website, Tangle Patterns.  Each week will feature a particular string and patterns who's names begin with the initials of the string's creator.  It is a simple, direct, and fun exercise.

The logo looks like this:

...a tile, with dots, a border, and the letters for the strings inside.  The heart on the first letter 'g' is a homage to Maria Thomas - where would we be without her?  Certainly not tangling!.  Thank you Maria.  My 'mark' is in the lower right hand corner.

"It's a Sting Thing" is ideal for all tanglers and is especially friendly to those just beginning.

Here are the particulars:
     Challenges will be posted on Tuesdays.
     Entries must be completed on Zentangle tiles or on your 3.5" x 3.5" paper
     Submit entries by emailing photos to me -  brunoadelem@gmail.com 
     Entries are to be submitted by Friday evenings - I find, and sadly I might add,
               that the cleaning and laundry need tending to on the weekends :)
     Photos and 'Best of Show' will be posted on Mondays.
    
This is going to be FUN!

Friday, August 9, 2013

Mum's(y's) the Word

"Mum's the word" is an old English idiom that means to keep quiet, to say nothing of what you've heard.  Pardon me, please, but I am doing just the opposite today.

I am just 'mad crazy' about the tangle pattern Mumsy by Sandy Bartholomew and not shy about saying that Sandy is one of my absolute favorite tangling artists.  Her books - Totally Tangled and Yoga for the Brain - are a constant source of inspiration for me.  I recommend them every chance I get. (You can purchase them from her at  Beez in the Belfry )

Mumsy is one of those patterns that epitomizes the beauty of Zentangle®.  It unfolds magically one stroke at a time. 

Here is the step-out I drew while learning the pattern - 
It begins with a simple center and builds by layering scalloped petals. 

While tangling Mumsy, there have been times when my lines were wavy not smooth, my petals very uneven, lopsided, not at all uniform in size, and so on.  Each time, I pressed on through my perfectionist tendencies and worked through the pattern steps.  EVERY time I was amazed at the results. 

By the time each petal is filled with auras, all the lines I had misgivings about blend in beautifully.

Shading the outer edge of each petal adds such dramatic depth and dimension.

Here is a  sampling of Mumsy in a few monotangles -


My hat's off to you Sandy Bartholomew - Mumsy is definitely the word!